Sunday, August 19, 2012

Warm Wishes Circle Card

This week's challenge on She's A Sassy Lady is to make a circle card with a window.  Here are the cards I made.  As Sheila suggests, I made two cards - one for now, one for later.


Also, I have decided to always make envelopes along with the cards I make.  I was beginning to get a "stash" of cards without envelopes, then having to make those on the fly - rather tiresome.  It is just as easy to make the envelope right after I finish making the card.  Then the whole project is finished.  Since my previous two posts have been very detailed and you can find all the tutorials you will ever need on Sheila's website, this post is much shorter than usual.

This card has been entered in the following challenges:

DL ART: Happy Birthday Linky Party and win Pretty Pennants  (closes Aug 31)

Have a blessed evening and enjoy your week.  Thanks for looking at my projects.

Saturday, August 18, 2012

Thinking of You Window Card


This is a note card sized sentiment card that fits the bill for many situations - illness, sympathy, friendship, family.  So I made several using a variety of Tim Holtz "Lost and Found" double sided cardstock for the background card and frame, with a light-toned glitter cardstock weight paper for the cover sentiment.

I love the license plates on this - lends an air of "across the miles".

A floral paper - so pretty!

This glitter paper is lighter than it appears in this picture.
The third paper has theater tickets on it.  Here it is complete with sparkly sentiment.
Outside and inside of floral card
Outside and inside of license plate card
Outside and inside of ticket card


Sentiment added to floral paper
Sentiment added to license plate paper
Adding blank writing area to inside of card


Cards with and without writing areas
 
All six cards completed
After adding writing areas to two of the cards, I decided the sentiment on the front of the card would not be visible enough against the light writing area, so I did not add one to all the cards.  The reverse side of the designed cardstock is light enough that a contrasting pen or marker will stand out nicely when used to write a message inside.  If I am not happy with the way it looks, I can always go back and add the writing area later.

Now for the envelopes
 Sheila at She's A Sassy Lady had a great video tutorial on her blog for making envelopes for any size card.  Since I don't do videos, here are a few pictures to recreate the essence of that project:

Using a piece of paper at least 2 1/2  times as long as your card,
measure 1/2 inch out from each side of the width of your card and score
next to your card all the way down the paper on both sides.  If one side is wider
than 1/2 inch from the side of your card, trim it to the 1/2 inch allowance.

After trimming, your paper should be creased just so.

Turn your card and place it where you want the envelope to fold over it.
Crease the paper above and below the card at the markings closest to the card,
making sure not to be too tight with your folds.

Cut the TOP FLAP ONLY along the fold allowance.

Round ALL corners BEFORE gluing envelope sides together.

Fold in side "seam" allowances

Apply your adhesive of choice to ONE side of the envelope seam allowance
and fold over - it is important to get the sides straight as the card will not go in the
envelope or will be difficult to insert if the envelope is "wonky".
 "Wonky" is a technical term for what happens when I get the side seams crooked - sort of like when I'm sewing and something stretches the wrong way - or does not stretch at all.  Anyway, just do not be in a big fizz when you are putting those envelopes together or they will go together crooked and will not work for your card.

VOILA!  Completed card in envelope.  Before sending, I most likely will
stamp a lighthouse, bird or tree on the envelope to add some detail.
Six cards with envelopes


Thanks for visiting Eagle Canyon Arts today.  Please let me know if you enjoy this site and if you have questions about any of the projects, I am always glad to answer them.

Remember to enjoy the wonders of your life and appreciate the blessings of simplicity.  Most of all, love the people around you. 


Sunday, August 5, 2012

Strawberries and Sundresses

So for some reason there is a lull in the storm - quite literally.  We have been pounded with thunderstorms off and on for a couple of days now.  Not the kind of weather we had in California....  One of the many reasons I LOVE living here - we have REAL weather!  FOUR seasons.  Well, I think so anyway.  Some people swear we only have three seasons - Winter, July and August.  But enough of that, where was I?  Oh yes, the lull in the storm - allowing me to write a post two days in a row.

As I mentioned yesterday, spring and early summer are usually filled with sewing projects, pictures posted (maybe) after the grand loves receive their wearable goodies for birthday gifts.  I still had one outfit to finish when we headed out for our visit, so today I combined a couple of project ideas.  I finally finished up the outfit I was working on for our grand daughter, and Sheila at She's A Sassy Lady has challenged us this week to make a shape card and "link it up".  First, here are the pictures of the Strawberry Sundress and Shorts with reversible hat:

Simplicity 5540, "Tutti Frutti" cotton blend fabric

Sundress

This side has watermelons

Strawberries and Blossoms
Shorts under the dress for active days

Pocket is gathered at the top, elastic in casing

Orange buttons to catch the eye!

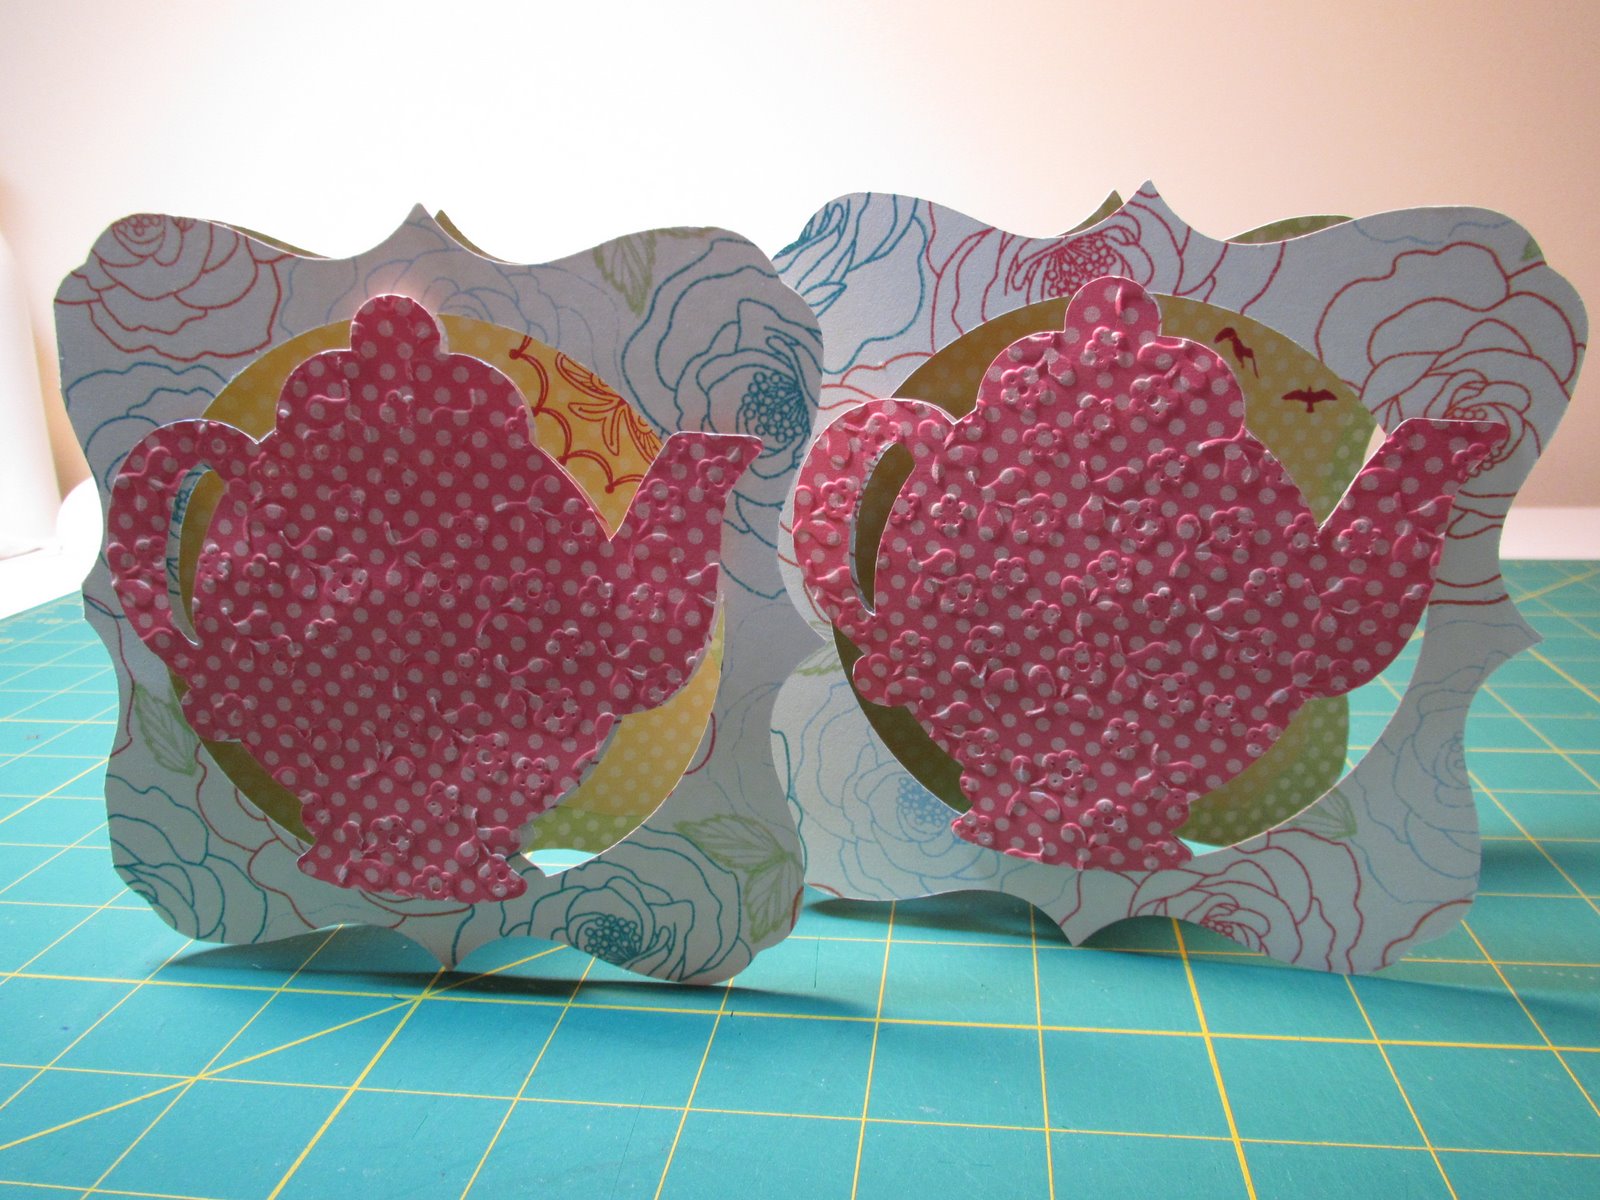
Since this will be mailed to our grand love in time for the school year, a little card of greeting will be a nice accompaniment.  Sheila had a great idea to make a "shape" card.

This card uses the "Country Life" cartridge and several layers.
Layers and sentiments

Here are several of the layers

This is the Shadow layer welded to create base of card
Some of the layers cut out
Base of card cut out

The paper started moving on the mat - EEKS!

A craft knife comes in handy to fix those mis-cut or uncut bits.
Two berries

Sweet!

The finished product

One for now, one for later


These cards came together very quickly and were fun to make.  Thanks for looking.  Have a blessed week and enjoy your talents in life, whatever they may be.

Saturday, August 4, 2012

It's About Time...

Well, I've been busy.  Later I will post pictures of the sewing projects I have created this summer for our "grand loves" for their birthdays.  It is fun to make clothes for them now while their moms like the stuff I make and the children are too young to turn up their noses at things.  Although, our grand daughter DOES insist on things having a "Princess" quality to them to meet her approval.

Now on to the main attraction - CARD making with SHEILA from She's A Sassy Lady.  Sheila has wonderful tutorials for the Cricut Gypsy machine.  She has been patiently making videos and putting up WONderful pictures and step-by-step instructions on her blog on how to make cards (and envelopes) for the past few months.  THIS week, she challenged us to link up a card we made using some of the techniques we had learned from her tutorials.  So, here goes nothing:

I used "Dotty For You" papers from Close To My Heart (CTMH)
Design was created with Cricut "Ashlyn's Alphabet" cartridge
Sizzix Big Kick embossing added some dimension
More Dotty paper and CTMH stamping

All the stamping was done using Tulip, a retired CTMH color

Sheila always says, "Why make one card, when you can just as easily make two?"
Another view of the two finished cards - next up, matching envelopes!


Oops, I forgot to tell you that I used Zots Dots to raise the teapots up from the card front a little bit to accentuate the dimensional aspect.  Here is the picture that shows that:

Also, you'll notice the yellow dot paper inside each card.  That adds a little more interest, provides a place to write a note to someone, and lightens up the inside of the card,  While I really liked the floral side of the paper used for the outside of the card, the green dot pattern on the other side was just so-so in my book.  So I was glad to find another color to use on top of it.  I hope you have enjoyed my expanded presentation.  Many thanks to Sheila for all the terrific tutorials and inspiration!